LIMNMEDIA - Adapter Plate, Layout Fluid & Linkage Details
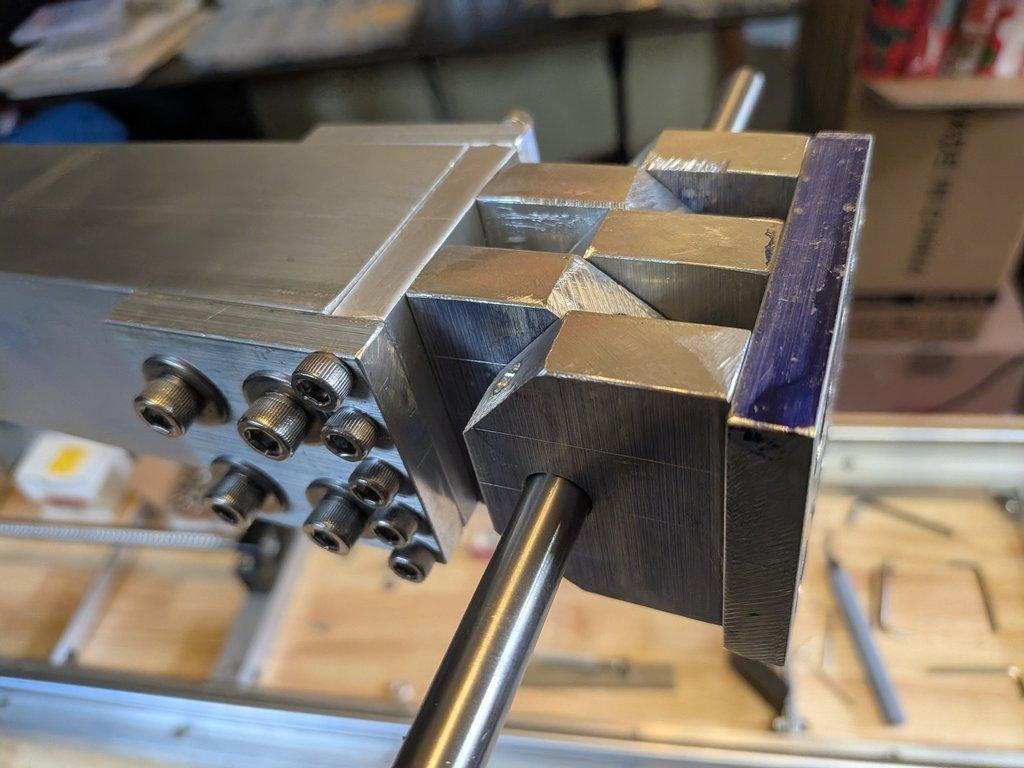
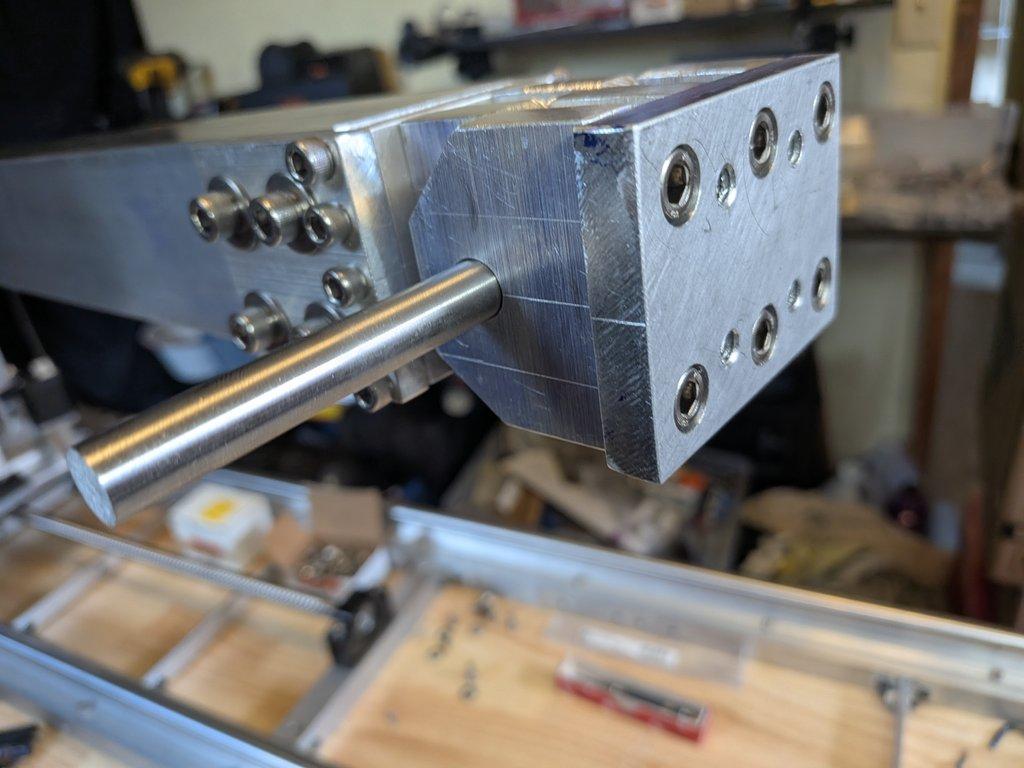
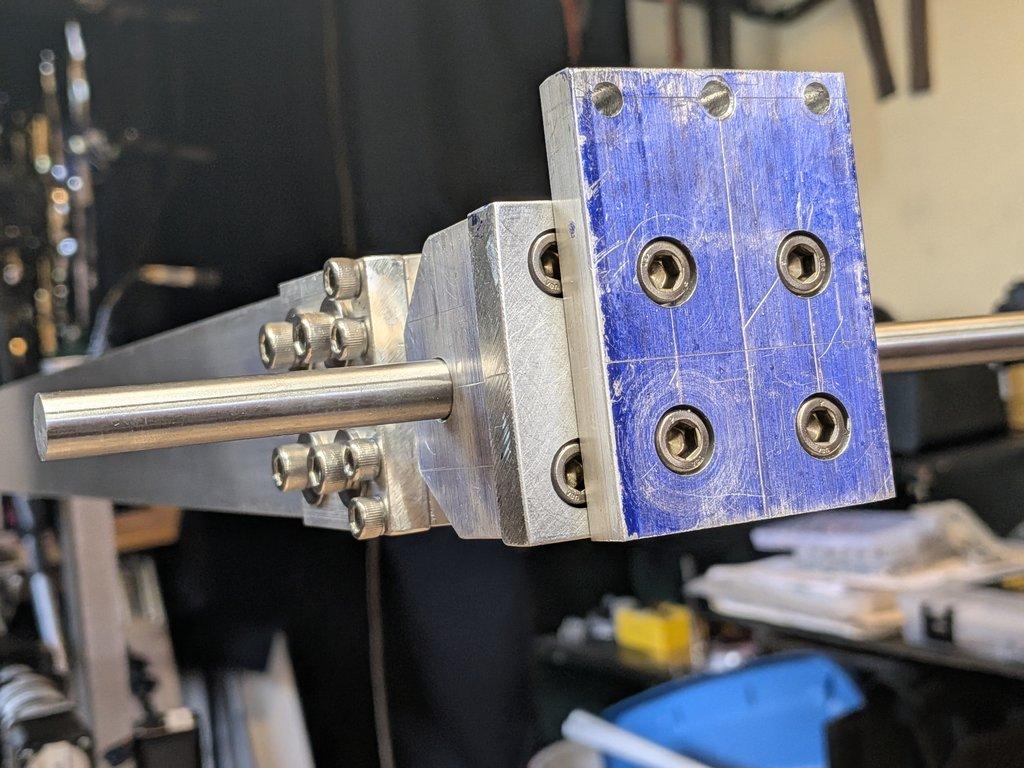
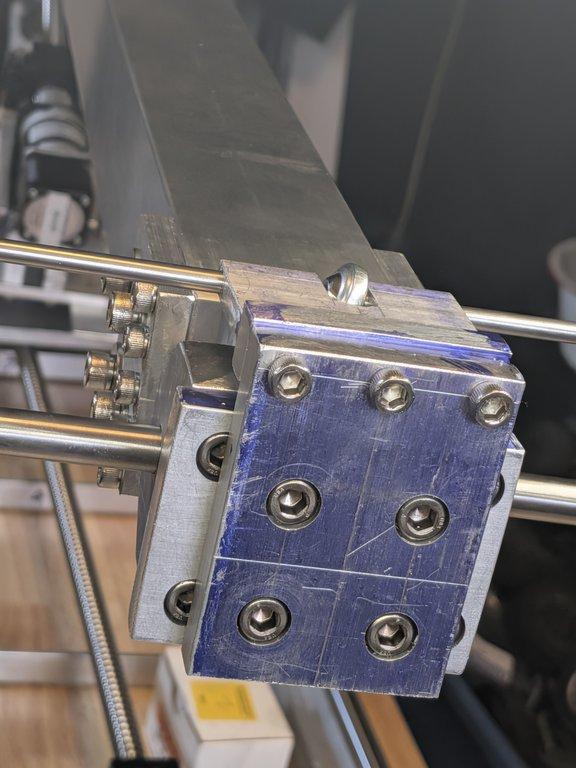
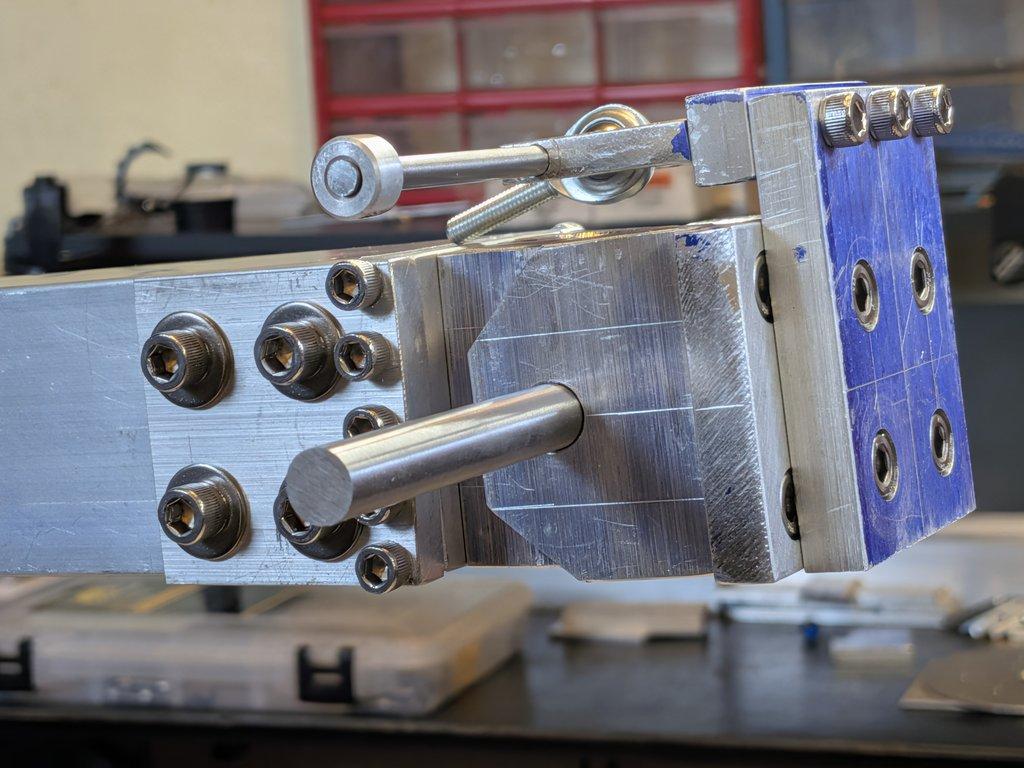
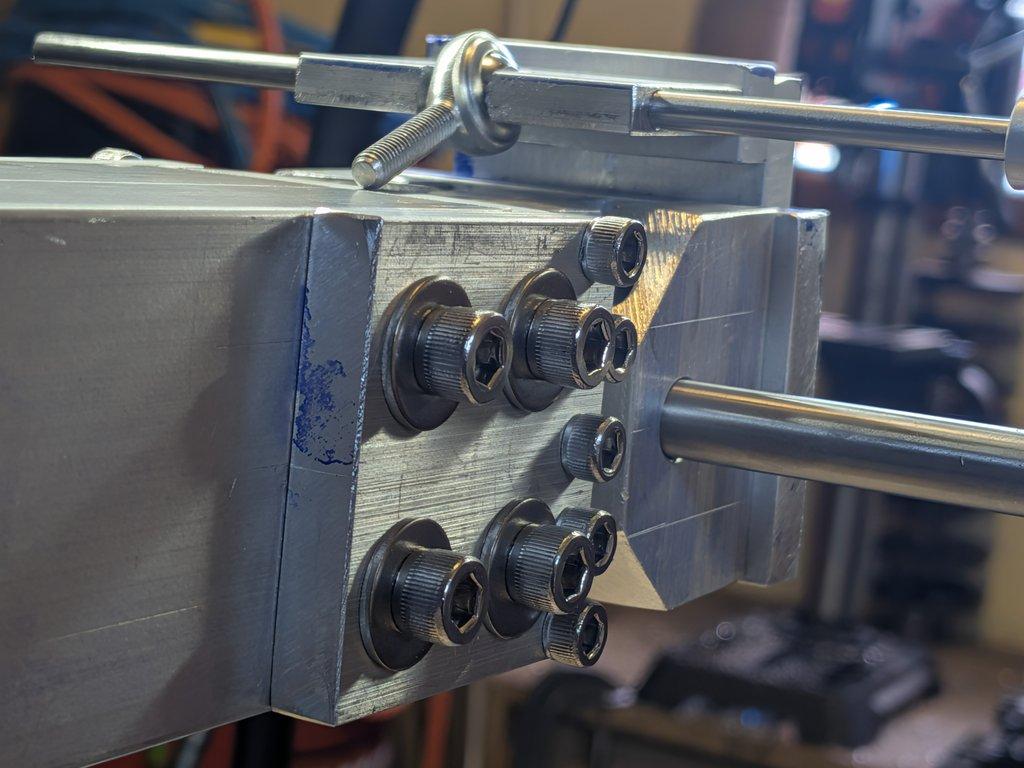
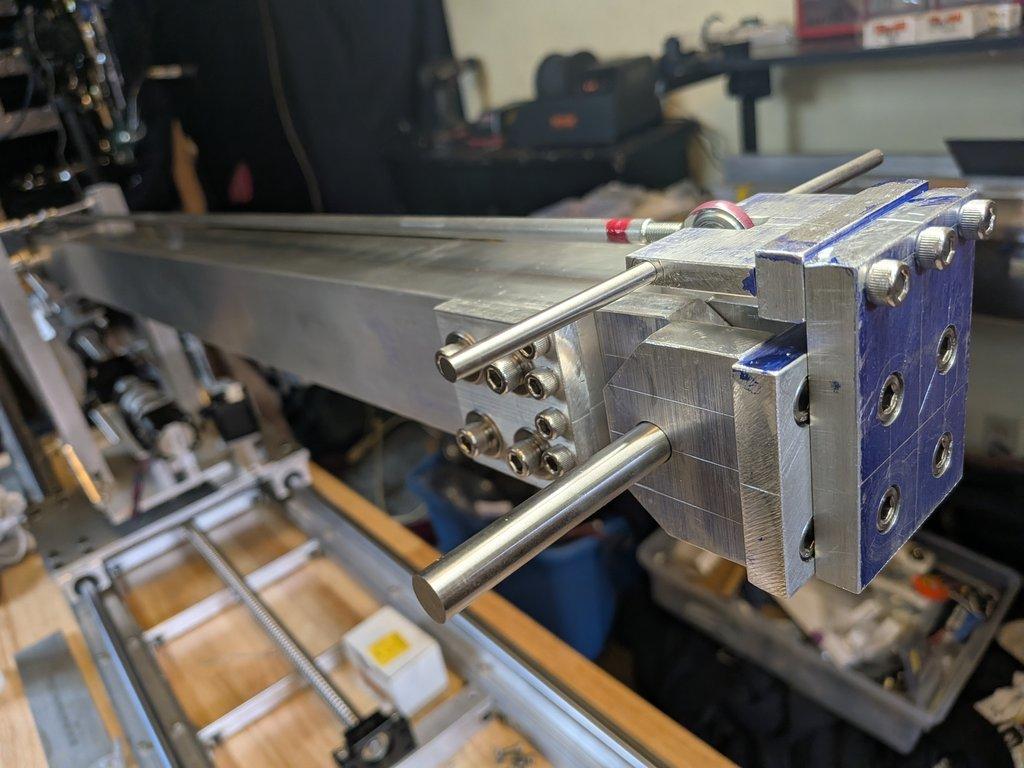
This stage shows the installation of the adapter plate that connects the hinge block (on the camera head side) to the vertical linkage that ties into the yoke and the upper parallelogram link.
This is one of those connection points where a lot of things meet in a small space, and the details really start to matter.
⸻
Process
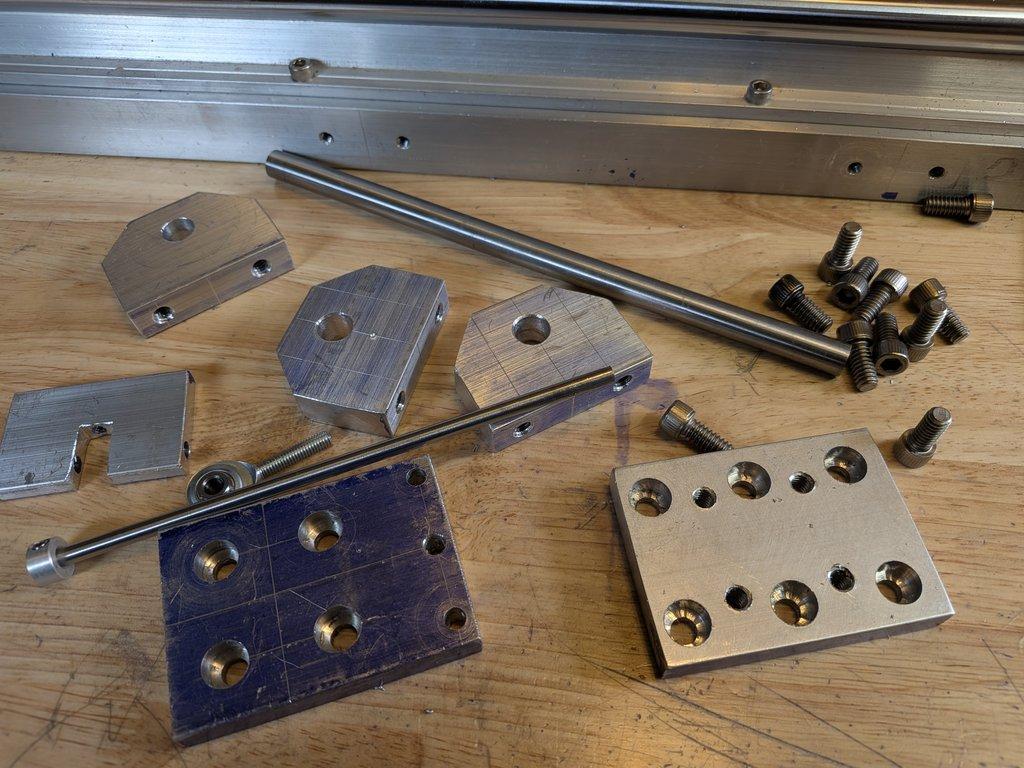
The adapter plate sits between the hinge block and the vertical connection that ties into the yoke. There’s a spacer in this stack that matches the thickness of the hinge base plate, which helps keep everything aligned and centered through that joint.
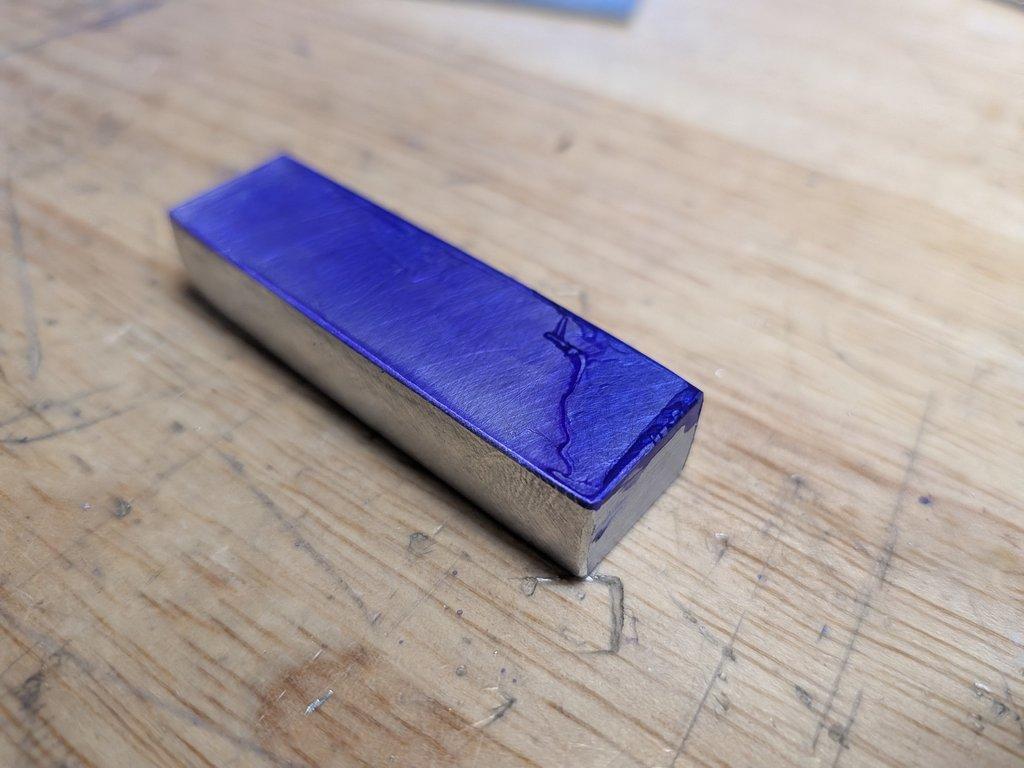
In the images, you’ll notice the blue coating on the metal—that’s layout fluid. It makes a big difference here. The scribed lines are visible from multiple angles, even at a distance, which makes it much easier to lay out hole positions accurately without a full machining setup.
There’s also a small red mark on one end of the eyelet. That’s just to keep track of the reverse-threaded side of the top link. Once everything is assembled, it’s not always obvious which end is which, so a simple mark like that saves confusion later.
⸻
Notes
This step highlights a few realities of the build.

First, the layout fluid is doing a lot of work. Being able to clearly see your lines—especially when you’re moving around the part or looking at it from different angles—makes basic tools go much further. It’s one of those simple things that really improves accuracy.
Second, the shafts I’m using here are honestly overkill for this application. They’re likely motor or precision shafts—hardened steel, very accurate, but not friendly to work with. Cutting them by hand is slow and difficult, and it doesn’t really fit the approach of keeping things accessible.
They work for now, but in a more practical version I would switch to something like:
- standard pins
- easier-to-cut materials
- off-the-shelf lengths that don’t require modification
Same function, much easier to build.
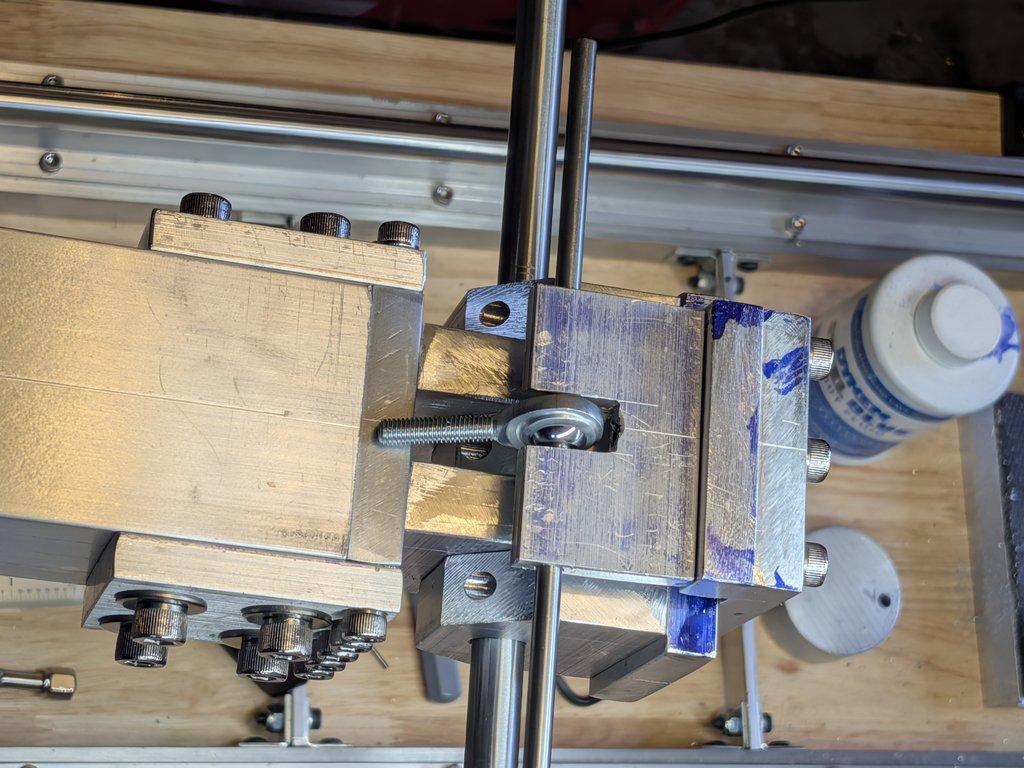
Third, this whole area is tight. There’s not a lot of extra room, and everything is stacking:
- hinge block
- adapter plate
- spacer
- vertical linkage
So alignment isn’t just about one part—it’s about how all of them sit together in that stack.
⸻
LIMNMOCO Context
This connection ties together multiple systems at once:
- the boom-end hinge
- the vertical linkage
- the upper parallelogram
It’s not a load-bearing centerpiece, but it’s critical for keeping everything aligned so the motion tracks correctly.
⸻
Why This Matters
This is a good example of working within constraints:
- limited space
- basic tools
- mixed hardware
And still getting a functional, aligned result.
The bigger goal here is to show that this kind of build doesn’t require a machine shop. You can get there with:
- careful layout
- simple marking techniques
- thoughtful part stacking
⸻
Final Thought
Some parts in this build are more precise than they need to be, and some are rougher than they could be.
That’s part of the process—figuring out where precision actually matters, and where it doesn’t.
Christopher Weinberg
Christopher Weinberg is the founder of LIMNMEDIA, where he develops motion control systems, production workflows, and educational tools focused on stop-motion and hybrid filmmaking. With over 15 years of experience in production, his work centers on making complex techniques more accessible through practical engineering and open development. He is currently building LIMNMOCO, a modular motion control system designed for flexible, real-world use.
No comments yet. Login to start a new discussion Start a new discussion